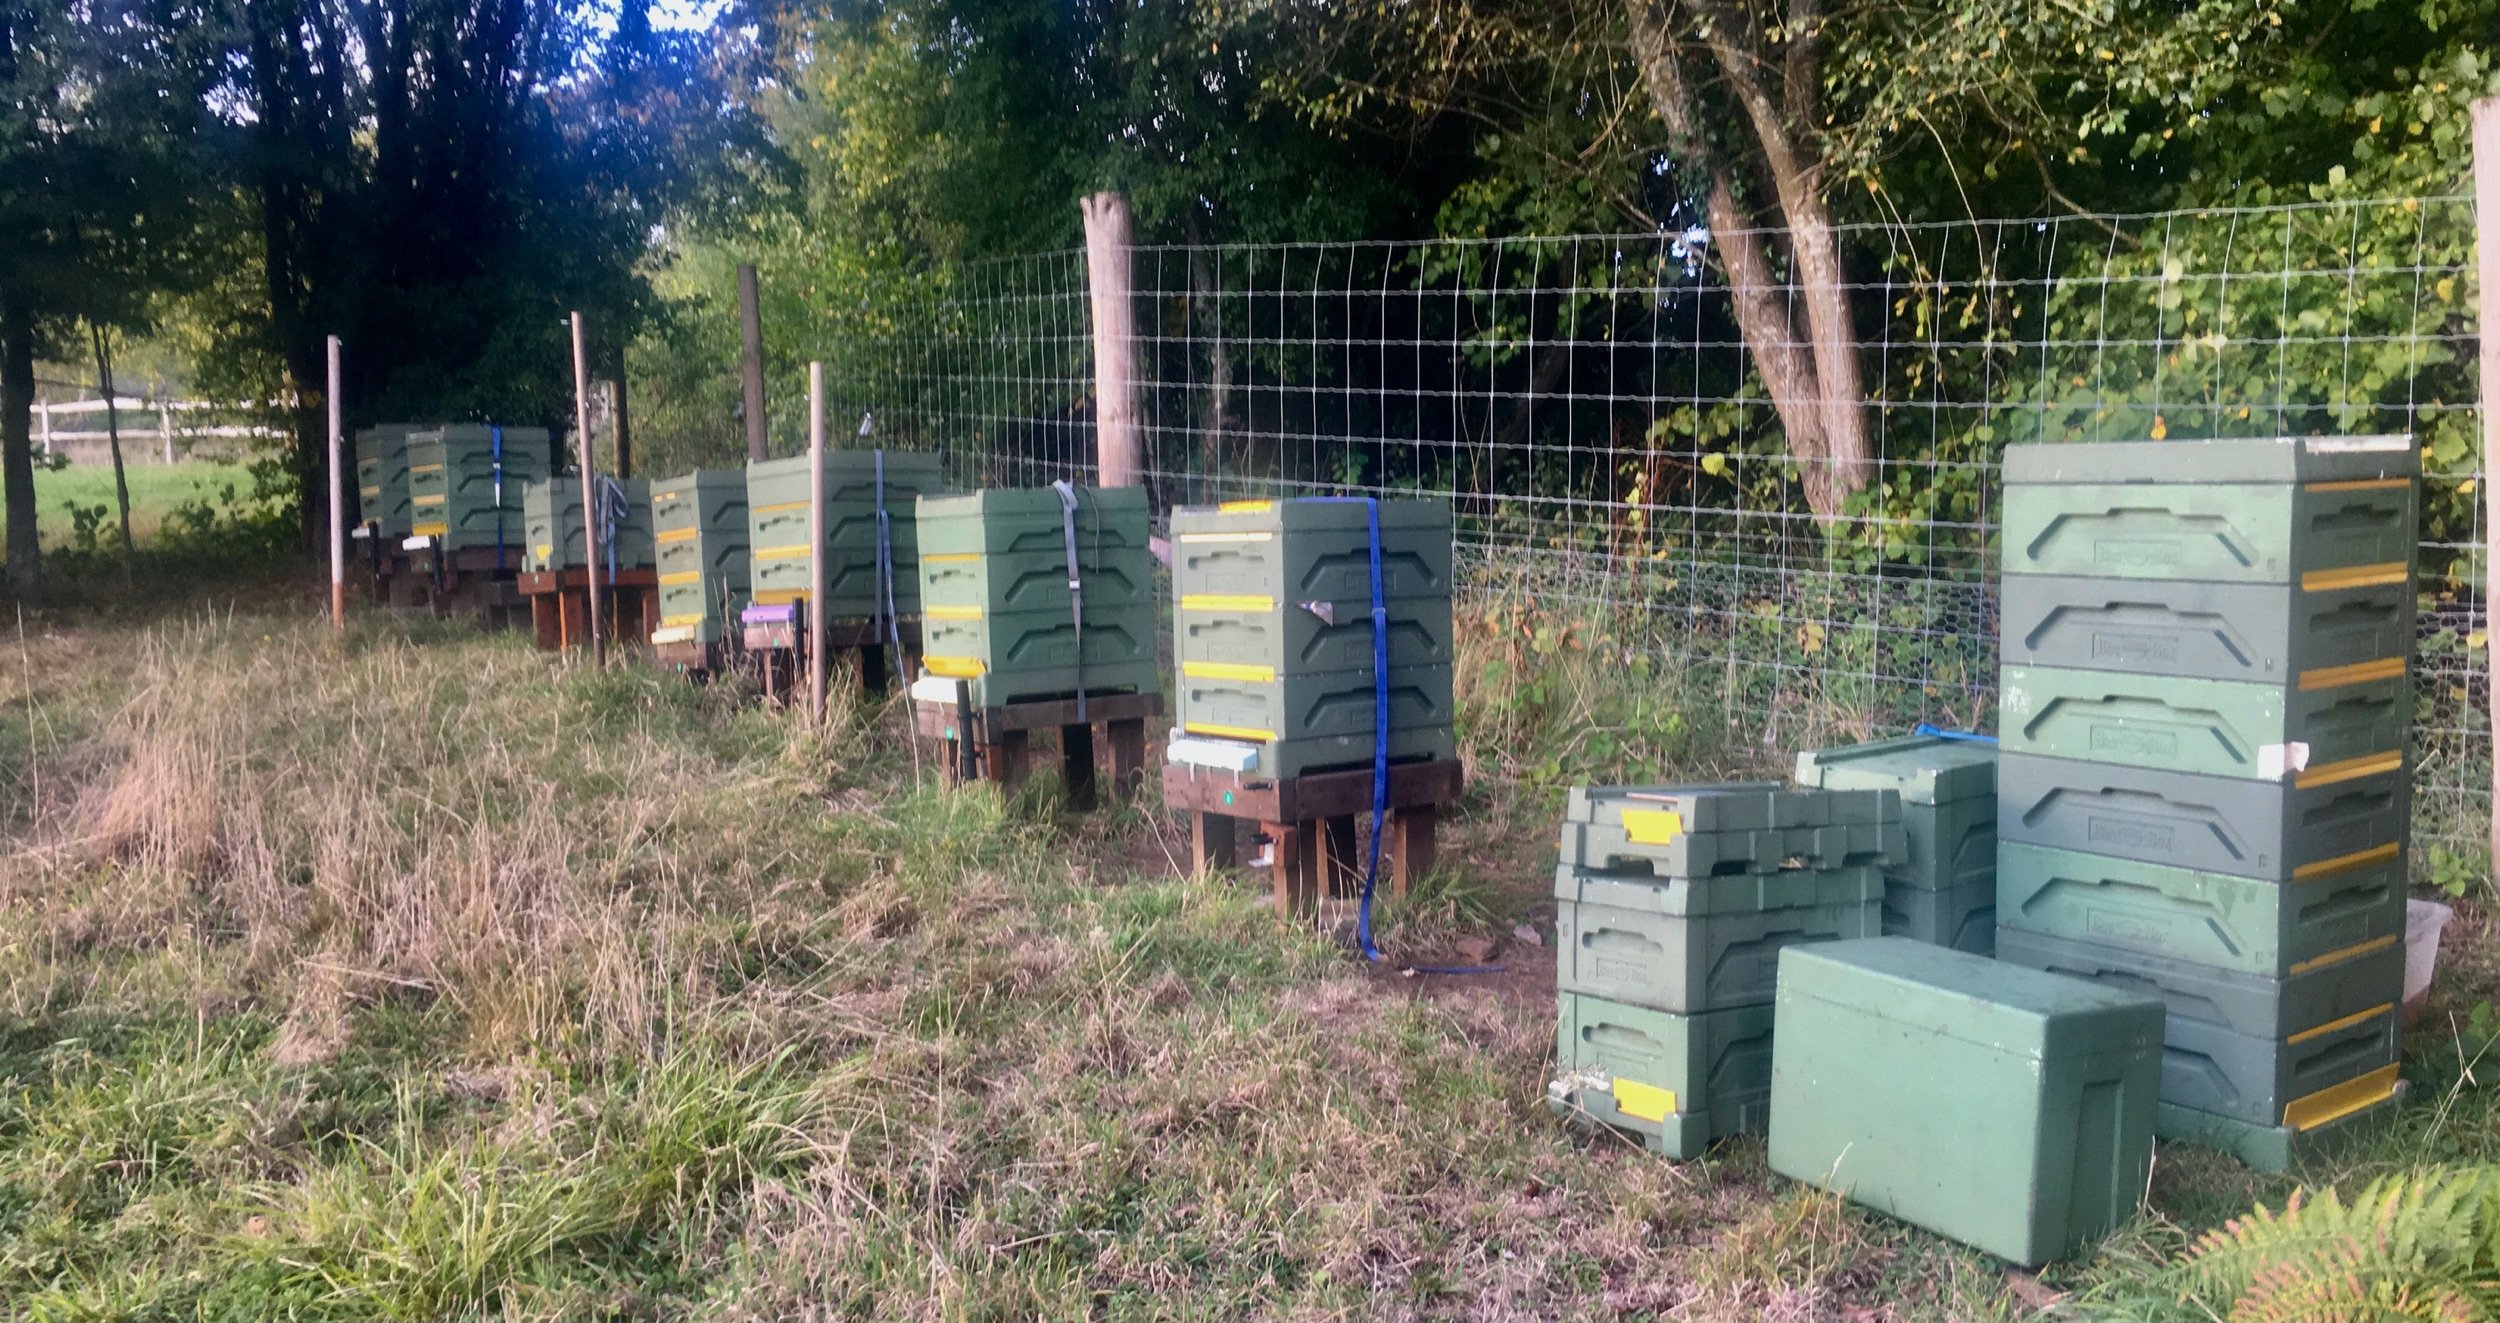
Inspecting colonies
Abbreviated version
Practical skills
Smoker
Basic Assessment: Be aware of the reactions of honey bees to smoke; demonstrate lighting and use of the smoker. Smoke briefly repels bees and also makes them gorge on honey, and this makes them calmer. Making a steady supply of smoke requires an invention, and fortunately, someone has made one. Moses Quibley had this eureka moment and deserves a knighthood, but he was a Quaker and generously never patented his invention. The smoker’s crucial feature is a hole as large as the diameter of a finger in the lower part of the bellows and another opposite in the firebox. When the bellows are compressed, a blast of air hits the hole in the smoker. As the bellows refill, they suck air from the surroundings.
Video Demonstration of lighting a smoker I would be surprised if his technique works for everyone.

Light your smoker 100% every time
The trick to lighting a smoker is to wait until the starter fuel is properly alight and then puff like mad. To start, light a match and immediately shelter it from any breeze by holding it just inside the burner. Light the newspaper and wait until it is properly alight before working the bellows. If necessary, push it deeper down with a hive tool. The flames may transiently look yellow; they are followed by orange flames as the fuel gets hot. Flames should shoot out of the top of the burner. When the flames die down, stop pumping and look in to check that barely any unburnt fuel remains, only black newspaper. If you put the secondary fuel in too early, unburnt newspaper can block the grate. Quickly throw in a handful of primary fuel, briefly do a few puffs and throw in another. Work the bellows for a minute. By now, it should be producing a thick plume of smoke. Despite this, the fire still needs to be established. Put in a secondary fuel (or mix it with the primary fuel). Work the bellows every few minutes.
When you stop working the bellows, a wispy plume of smoke should continue coming out of the spout. If you find it difficult to light, try using hessian (burlap) or make a cylinder of rolled-up cardboard. Put the cardboard roll on the end of a J-shaped hive tool, hold it up, and blast it with a gas torch.
Once alight, check that the smoke is cool by placing your hand in the smoke plume. You may like to place some green grass or a loose sheet of newspaper on top of the fuel. This will stop fuel flying out and also cool the smoke.
The science of combustion
for the total on-scientist
When carbon reacts with oxygen, it forms carbon dioxide, releasing heat. The faster the reaction occurs, the quicker the heat is released and the hotter it gets. You can increase the combustion rate in two ways: Adding extra oxygen and making the carbon readily available. So, with a smoker, work the bellows and use a starter with a large surface area like newspaper. The intense heat released as the newspaper burns heats the grate and surrounding metal, but it doesn’t last long, just long enough to heat lumps of less flammable fuel.
It is not the visible flames that make the smoker light; The flames are a sign of combustion; the combustion produces heat; the heat lights the paper. The maximum heat occurs when the starter is almost spent and the flames are scorching orange. Once alight, the burner restricts the amount of oxygen available (not too much or too little), so the lumps of fuel release heat slowly, burn inefficiently, and produce smoke. If the fuel is damp (even microscopically), some energy is needed to evaporate water before combustion occurs, so it generates less heat, and the smoker goes out.
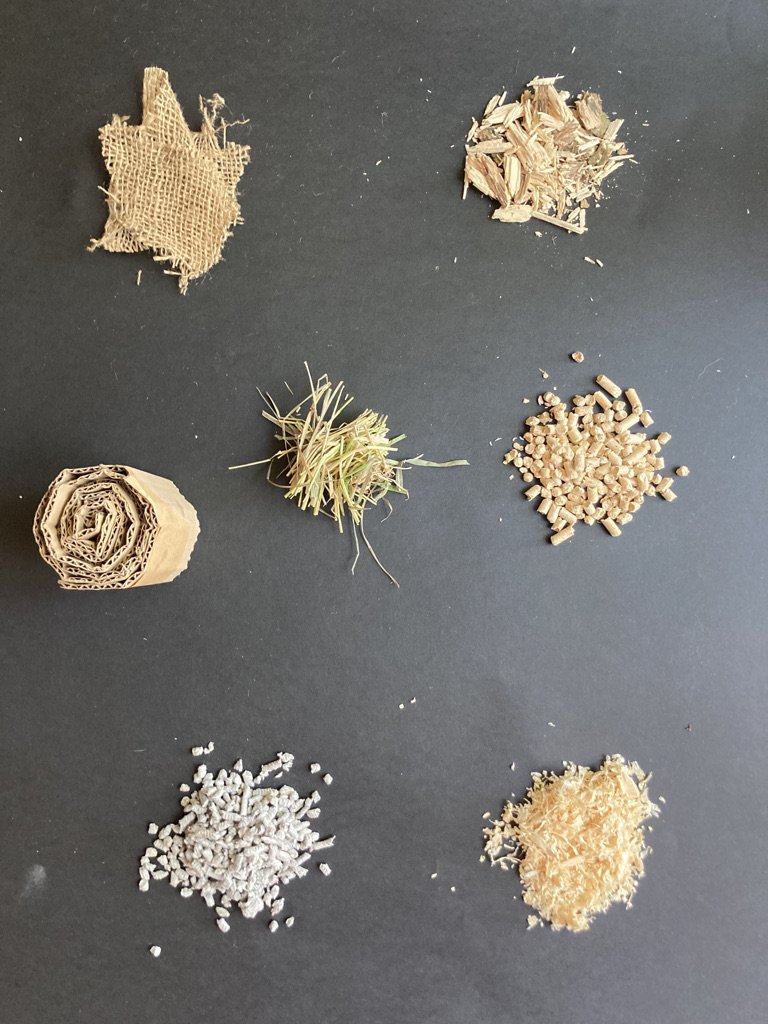
Fuels - must be bone dry
Lighting: newspaper, shredded paper, normal paper, or hessian
Primary: semi-dried grass cuttings, sawdust, cardboard, or smashed-up wood from dead branches.
Secondary: rodent litter/food pellets made from wood or compressed paper, twigs, or charcoal.

Smoker with hinged lid

If the grate falls out use mesh instead.

If a smoker is left unattended it can start a fire.

Well lit.

Use a twirl of grass or a bunch of paper to stop sawdust flying out.

Sawdust and dead bees on the floor of a hive.

Charcoal after using wood pellets or twigs. It can be reused after being dried.

Litter pellets make a great secondary fuel.

Once the smoker is no longer needed, put it on its side and stuff the spout with grass or a cork.
Start the inspection
I can’t teach you how to inspect a colony, but I can give some tips. I recommend you attend your local Association practical sessions and watch some YouTube videos.
Puff some smoke through the entrance and onto the hive floor. Wait two minutes for it to take effect. Meanwhile, observe the entrance.
Pollen
Observe the colour of the pollen they bring. This may give you an indication of which flowers they are visiting. At the end of the year, you might like to submit some honey to the National Honey Monitoring Scheme to learn what plants your bees have foraged.
If many incoming bees have the corbiculae (pollen baskets) on their legs puffy with pollen, it signifies that the queen is laying and the colony is feeding open brood. Pollen is a package of amino acids, fats and carbohydrates.

Each larva requires 135mg of pollen. However, the protein value of pollen varies from 8 to 40%. The bees are unable to determine this, so they increase their foraging in response to a shortage. Over a year, a colony consumes a staggering 15 to 30 kg. The most distinctive colours are:
Dandelions - orange
Sweet chestnut - red
Himalayan balsam - grey
Siberian Squill - blue
Ivy - white

Orientation flights
Bees noisily bobbing up and down, flying facing the hive. Each bee flies vertically with a slight horizontal component, usually as part of a group. They are noisy and enthusiastic. The short-lived flights end abruptly, but busy hives may have longer dances. It looks as if foragers join in as they find their way through the cloud.
Noise
Colonies make many noises, which are challenging to interpret. Before a swarm, some bees run on the comb. Because of this, some beekeepers claim to be able to anticipate when a colony is about to swarm. Queenless hives are sometimes noisy and roaring. Orientation flights (photo) are loud.
A tinkling or whirring noise suggests they are fanning to reduce the water content of nectar.
Look inside the hive
Smoke the entrance and fire a couple of puffs inside.
Remove the roof
Peel off the inner cover/lever off the crown board
Place the cover on the roof down behind the hive. Usually, bees stay on the combs, but some may spill onto the walls once disturbed. Ease the boxes apart. Wiggling your hive tool from side to side can help.
If many bees scramble, smoke in the gap, and listen as they are driven back, a hiss means there are a lot of bees. If it is a super, you don’t want to smoke too much, as the honey can become tainted.
The disruption to normal colony function caused by an inspection takes hours to subside. The effect of a puff of smoke reduces their stinging for a tleast least 20 minutes, and it takes two hours before they rid themselves of the effect of having a crop full of honey.
Once the edges are open a crack, check for stuck-up frames by running a hive tool along the gap. This is only possible with Paradise honey hives, not other poly hives. This is because Paradise hives have plastic edges that slope down slightly (from the inside to the outer edge) with a 6mm lip. Other hives have a deeper L-shaped lip, so this technique is impossible. To free frames that are stuck, wiggle your tool to free them.
Alternatively, make a 10 mm gap to see the problem frames and push them down.
After this, I shove the handle of my bee brush into the crack. This prevents the bees from getting squashed when I open the other side of the box. The burr comb can often be broken by twisting the top box over the lower one. But the bees disapprove.

The view through the cover shows plenty of bees and a blue paperclip supporting an Amitraz strip.
Without the inner cover, the underside of the Beebox roof becomes covered with burr comb.

Once a super is free, put it behind (if possible placed diagonally on the roof) to the side of the hive, not on the ground.
Place the upper brood box on the supers separated by the QE or preferably on a spare roof. If there are QC on the bottom bar of the top box, they may be squashed on the QE. Unless you are careful, the Q could get lost.
Do not inspect one brood box on top of the other; the Q may play hide and seek. Theoretically, you may smoke angry bees down to the bottom box, where they will hold a reception party for you.

Observe how the bees are reacting. The situation in the photo is okay but they are displaying signs that they are unsettled. Three guards are assuming an intimidating stance as they line the edge of the frames. Other bees are bumbling around.

Basic Assessment: demonstrate the use of a hive tool.
This video about using hive tools is the best I can find. But keep your finger on the fast-forward button to cut out his blather. There is no right way to use a tool, just a way that suits you.
It is handy to hold your hive tool in the palm of your hand at all times rather than putting it down (and losing it). But held like this it can damage a poly hive. Note that in this hive, the frames are orientated warm way.
Basic Asseement - The care needed when handling a colony of honey bees.
As you start your inspection puff smoke over the top of the frames to push the bees down. However, if the top of the frames contains brace comb mixed with honey, the bees act like cows in an American style feeding lot. Spray them with water and brush them off.

Pick up frames.
First, you must create a working space by removing the first frame and dummy board.
A thin frame called a dummy board means that you can remove the first frame without “rolling” bees. The dummy board consists of a sheet of wood instead of foundation, with insufficient space around it for the bees to draw comb and too large for them to fill with propolis. To understand “rolling”, imagine the gap between the frames is teaming with bees crawling all over each other. If you pull a frame with insufficient room around it, the bees that are clinging on tightly come up with the frame. But bees that are less well attached lose their hold and tumble around. That is what rolling bees means; unsurprisingly, they don’t like it.
Dummy boards are unnecessary when using plastic frames. The gap between the first frame and the wall is too wide, and they should fill it with a comb, but they very rarely do, and if they do, they rarely finish the job.
It does not matter which brood box - top or bottom you inspect first.
QC are more likely to be in the top box. If you are right-handed, free up and hook up the first frame (or the dummy board) at its left limit. Put the first frame safely in a sealed box like a nuc; otherwise, lean it against the front of the hive.
Whenever you see a line of beady eyes in the cracks between the frame you wish to remove, gently smoke them down.
Basic Assessment: the reasons for opening a colony Be purposeful. What are you looking for? It may just be eggs, to check for queen cells, progess or presence of stores. As you inspect stay aware of how the bees are reacting.
Don't tilt frames with a starter strip or unwired wax foundation when inspecting them. The wax may fall off. A special technique is necessary to prevent the comb from falling apart. Move the long edge into the vertical and swizzle it around 180 degrees, swap hands, and lift it up so that the long edge is horizontal.
It is essential to have the sun behind or above you. I met a beekeeper whose apiary was beside a hill, and he could only do inspections before 2 p.m.
Inspect each frame in a measured way by shifting your focus systematically back and forth, like when looking for something lost in the grass. Our brains are only capable of assimilating data at a certain rate. Faster than that, and it obligingly confabulates to fill in the gaps so you don’t know what you’re missing. But if you move your eyes too slowly, the queen will move out of view to a segment you have already inspected. Our central area of detailed vision is no larger than your thumbnail when you hold your hand at arm’s length. Our eyes constantly dance around, so we don’t notice. But it explains why one sees the queen one moment, and then she’s gone.
Shaking bees off brood frames
Basic Assessment: Demonstrate how to shake the bees off the comb and look for brood diseases. When on the hunt for queen cells, even small puddles of bees can hide them, so shake the bees off. This stresses the bees, so most people compromise.
Hold the frame obliquely (the hypotenuse) over the box's surface. Shake it with a down movement and a sudden stop.
You can only learn so much from YouTube: here is an example of how to learn from someones mistakes
Click here to learn from his mistakes
The first frame shows drone brood in worker cells - not normal (but not infrequent; observe).
The bees shake their bodies and run around on the combs - an undesirable trait.
He rolled the bees by removing the second frame and pushing it in again before making a working space.
No dummy board; that’s okay; not everyone uses them.
A bee that has emerged does not go straight to nursery duties.
It was probably too early to add a super.
They had plenty of combs to draw. There are various rules of thumb regarding when to super, like when a box is mostly full of bees.
The laying pattern was okay on one frame but rather spotty elsewhere.
The bees stayed between the frames, which was nice.
He missed a great opportunity to mark the queen — whilst the colony was small, not everyone marks their Q.
He was using plastic foundation for brood and wax foundation in the supers, that is what I do. Usually, if people choose to use a combination, they do it the other way around, as plastic does not blow out when the honey is extracted.

As you progress with your inspection, you will come across a frame containing a lot of pollen. The queen is usually to be found somewhere beyond this in the brood nest.

A frame in September, there is a ring of pollen around the brood with an arch of stores above.

Each plant’s pollen is distinctive in colour and form.
Eggs: When you see eggs, the likelihood is that the queen is close. You need good eyesight to see the orientation of an egg. Eggs lean at an angle on day two and are horizontal on day three. But just be content to see eggs! As you work through the box, see if the queen has space to lay. A reasonably prolific queen needs a second brood box when there are seven frames of brood or lots of bees.

Your viewpoint must be taken into account when attempting to date eggs. You don’t need to know egg age.
Limited inspections
Basic Assessment: he reasons for opening a colony When learning a skilled task, it helps to break it down into its simplest constituents. If you start with a nuc you won’t have too much to look at, but it can feel daunting when it grows into a large colony. So, if you feel overwhelmed, I recommend you check these variables:
1. Are eggs present? (Young queens occasionally lay two eggs in a cell. This is normal)
2. Are there eggs in queen cups, or are there QC? Mark any frame that contains a QC with a drawing pin or a paint mark, and record the age of the QC.
3. Have they got some stores? At least one good frame to last a decent colony one week.
4. Has the queen got space to lay? There should always be a couple of drawn frames, except when a lot of nectar is coming in.
5. Does the sealed brood look healthy?
That’s it, you’re done.
To begin with, concentrate on these until your excitement settles. You may note other things in passing, but focus.

A bee inspecting a Geranium Rozanne (an amazingly floriferous plant that is unpalatable to slugs)
Detailed inspections
Once you get quicker at inspections, look in more detail:
Assess the amount of nectar being processed; It is a partially invisible process. To turn nectar into honey, bees blow it into a bubble between their mandibles, using the breeze in the hive to reduce its moisture level. After this, it is processed in the comb, where it takes 1 to 5 days to reduce the water content to 20%.

The brood pattern can be one of three types: carpet laying - a whole frame in one go, concentric laying and spotty. When there are two brood boxes, a clever Q sometimes lays as if the gap between the boxes does not exist. A spotty laying pattern has several causes, including disease.

Grumpy bees
Some bees are defensive as soon as their hive is opened. If they did not fly out at you when you opened the hive a crack, the first sign of grumpiness is that the background noise in the hive changes; Tetchy bees fly up at your hands if you move them too rapidly across the top of the frames. Unsettled bees line up in the spaces between the frames, showing off their intimidating beady eyes. A sizeable colony almost immediately throws a couple of bees into orbit around your head. A sting due to poor handling is insignificant, but if one stings without provocation, the colony doesn’t like you. Each sign on its own is not worrying, but in combination, they are. However, with judicious smoking and a deft touch, you can stay in control. It is wise not to lift a frame before smoking down the guards.

Intimidating bees line the spaces between the frames.
If the bees completely line the frames, they are spooked. Carry on your inspection if necessary, and you are prepared to get stung. Do the essential things. If you’ve been inspecting them for a long time, stop and avoid doing anything that will wait until tomorrow.
If you bravely carry on, maybe because their temperament is always unkind, or you must find the queen (for swarm control), a bee may start buzzing around your visor, trying to force it’s way into your suit. When bees run around on the combs, there is no hope of finding the queen. If you seek the queen for swarm control purposes come back tomorrow (in the morning, before she swarms) or use a form of swarm control that does not require the queen to be found.
If your bees are always over-defensive, remedy any contributing factors and re-queen.
Inspections in poor weather

Defer the inspection
The cut-off for a full inspection is around 14 deg., So long as the bees are flying.
If the weather is unfavourable, e.g., 12 °C, and the bees are still flying, do a partial inspection in just a minute or two. The wind and sunshine should be considered. A sheltered south-facing site pays dividends. If there is only one brood box that is not congested, and your strain of bees isn’t prone to swarming and is not very prolific, the risk may be low, but you never can tell with bees.

It is rarely necessary to inspect a colony in poor weather. If you must, put the varroa board in for 1-2 days, and the crud on the board will show the site of the brood nest.
Open the hive and if they object, use plenty of smoke. Otherwise, look over the top of the brood box to see if more bees are evident over three or so frames. Lift a few frames and check for queen cups (pc). If none, terrific; they should be okay for a week. But if you see queen cells, Oops, that's a problem. Activate the swarm trap.
Drawing comb and supering
The quickest method is using their swarming urge, whether natural or simulated: Shook swarms, Bailey, and Taranov manipulations seem drastic, but they emulate a natural process. These are the methods that work consistently. More information.
Always tempt them by giving them a starting point—a drawn comb or preferably open brood. This means putting frames in the area to be drawn, e.g., in the middle of a box of undrawn frames or above the brood nest.
Give them a ready-to-go surface: fresh wax foundation, starter strips or well-waxed plastic frames.
Do not provide an obstruction - no queen excluder.
The correct timing. If a large nectar flow grabs their attention, they prioritise storing it in their existing comb. Only when all the drawn comb on plastic frames is occupied with honey and nectar do they notice a problem frames. Bees on wax foundation do draw some comb in advance. If they are in the main flow, they are unlikely to swarm; let them get on with it. It is possible to stimulate a flow in the spring by giving them a sugar solution. But if the colony becomes cramped, it may cause them to swarm. Be careful they do not store sugar rather than nectar.
They should continue drawing comb once they recognise a “hole”, a significant hole. Frames without foundation provide this impetus.
Avoid using colonies that are ill or out of sorts e.g., high varroa count
Use large colonies
Avoid hot or cold weather when the bees are preoccupied with controlling the hive milieux. Warm weather helps.
Some people spray the frames with a sugar solution. I’m dubious as to whether it makes a difference.
Undrawn frames are filled if they get in the way of the bees. Placing them in the centre of the brood nest is usually frowned upon as it “splits the brood”. This is a problem when the bees are using one brood box and are not numerous. But if the brood boxes are oozing bees, interweaving frames of foundation or frames without foundation between brood frames is not an issue.
Some manipulations are very effective for drawing comb: Detailed information
Adding boxes and supering
Supering
Honeybees need to know they have plenty of space in their home, and this depends on how prolific your bees are and the queen’s rate of lay. For example, colonies headed by a young queen do things faster. It is impossible to be precise. If they are drawing combs, super before they have started on the outermost frame. When all the combs are already drawn, do it when 3/4 of the frames are well covered with bees. Many beekeepers add two supers once a brood box is 3/4 full and super again when the first super is 50 to 80% full of bees. How to super depends on whom you talk to. Slow down if they are partially filling frames with honey here and there, and there is space for them to dump nectar. Better more space than less.
You might like to read >> Tips on keeping hive records >
Next, uniting two colonies to form one, and raising queens.
Page 5s.
